
Santa Fe Wood Flooring handles hardwood floor installation in Santa Fe, NM, serving surrounding cities including Agua Fria, La Cienega, Eldorado at Santa Fe, Valencia and Lamy. Across 20+ years of installing solid and engineered hardwood, we have learned that a new floor succeeds or fails on preparation: moisture readings, acclimation, a flat subfloor and the right fastening method for the substrate.
We install solid hardwood over wood subfloors, engineered hardwood over concrete slabs and radiant heat, and floating floors where a condominium or an existing hard floor calls for one. Every installation starts with readings in the wood and the subfloor or slab, written on the estimate, so material is never laid before it is ready.
If you are comparing quotes, the itemized estimate is the place to start. Removal, preparation, material, labor, transitions, finish and tax are separate lines, so you can see where the money goes and compare one bid fairly with another.
Choosing Hardwood for a Santa Fe House
Solid Hardwood or Engineered Planks
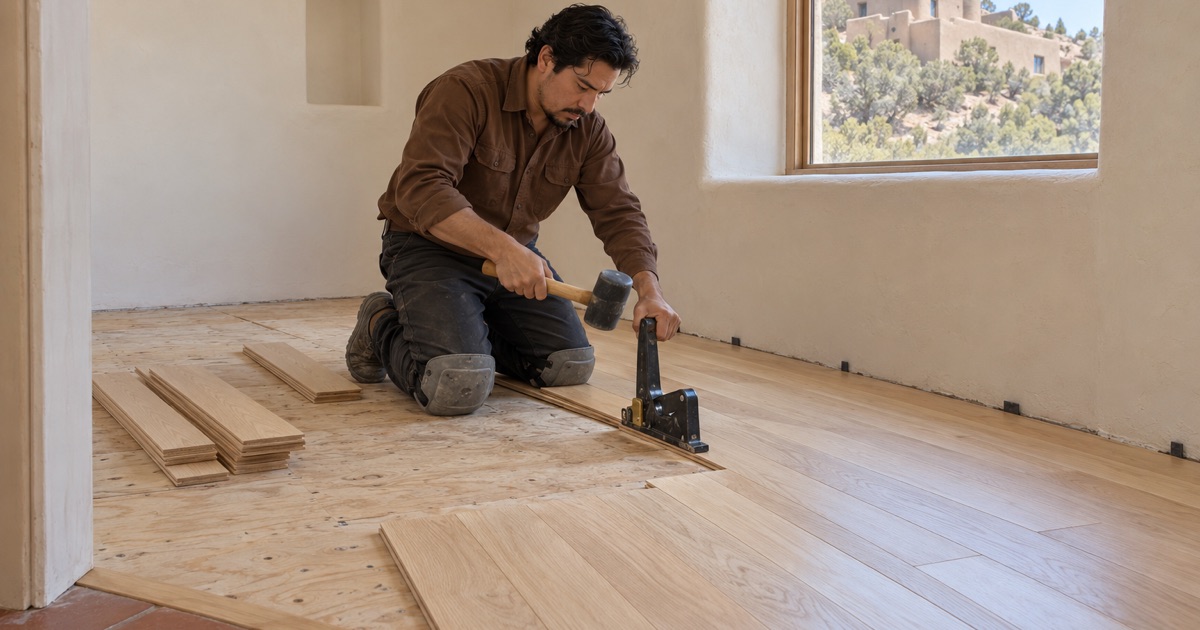
Solid hardwood is one piece of wood throughout. It can be sanded many times over its life and suits a plywood or OSB subfloor on joists. Engineered hardwood is a real hardwood wear layer on a cross-layered core, which moves less with humidity and can go over a concrete slab or radiant heat where solid wood is a risk.
In a dry climate, both perform when the house is kept in a reasonable humidity range. We recommend by substrate, heat source and board width rather than preference alone.
Species and the Janka Hardness Rating
White oak, red oak, hickory and maple are the species most homeowners choose, and the Janka hardness rating is the standard comparison of how well each resists dents. Hickory and maple are harder than the oaks; pine is much softer and shows wear quickly.
Hardness is only half the story. Stability matters as much in dry air, and NWFA data lists mesquite among the most dimensionally stable species, with a shrinkage value of 3.2. We compare species on both measures before recommending one.
Board Width and Dry-Climate Movement
A wide board moves more across its width than a narrow one, simply because there is more wood to shrink. Narrow strip flooring spreads seasonal movement across many small joints, while wide plank concentrates it into fewer, larger gaps.
Wide boards are still possible in a dry house. They call for careful acclimation, a stable species, often an engineered construction, and a clear expectation that some seasonal gapping is normal.
Hardwood Installation Methods
Nail-Down With Cleat Nails or Staples
Nail-down installation drives a cleat nail or flooring staple through the tongue of each board at an angle into the subfloor, hiding the fastener under the next board. It is the traditional method for solid hardwood over a plywood subfloor or OSB subfloor, and it gives a firm, quiet floor.
We set fastener spacing to the manufacturer’s schedule and the NWFA installation guidelines, and we avoid over-driving staples, which splits tongues and causes squeaks later. Air pressure on the nailer is checked on scrap before the first row so every fastener seats the same way.
Glue-Down on Concrete
Glue-down installation bonds engineered flooring to a concrete slab with a trowel-applied adhesive. It suits slab-on-grade homes, in-slab radiant heat and rooms where a nail-down floor is impossible.
The slab has to be flat and dry enough for the adhesive, so we grind high spots, fill low ones and test moisture with a calcium chloride moisture test or an in-situ relative humidity test before any adhesive is opened.
Floating Installation
A floating floor locks board to board over an underlayment without being fastened to the substrate. It is fast and can cross some existing floors, and in many condominiums it is the method the association’s sound rules point toward.
Floating floors need a flat substrate and a full expansion gap around every wall, cabinet and door casing. We plan where heavy islands and built-ins go so they do not pin the floor in place.
Our Step-by-Step Hardwood Floor Installation Process
Step 1: Site Visit and Moisture Readings
We measure the rooms, check the subfloor or slab for flatness and fasteners, and take moisture readings in the substrate and the room’s relative humidity. Door clearances, appliance heights and every place the new floor meets another surface are noted on the estimate.
This is also when we look for the problems that change the plan: a slab that reads wet, a subfloor that flexes between joists, or a radiant heat system with a setback thermostat. Finding them at the estimate costs nothing; finding them halfway through installation costs days.
Step 2: Acclimation and Subfloor Preparation
The wood is delivered and left in the house with the heat or cooling running as it will be in daily use, while we read its moisture content until it falls within range of the subfloor. Meanwhile we remove old flooring, screw down loose panels, flatten high spots and fill low ones.
Acclimation is judged by the meter, not the calendar. Wood that arrives close to the house’s conditions may be ready quickly, while boards shipped from a humid warehouse can need well over a week before they stop giving up moisture.
Step 3: Layout and Transitions
We snap a starting line, plan board direction through connected rooms and decide how every transition to tile, brick, flagstone or carpet will be finished. A reducer strip, T-molding or flush transition is chosen from the measured height difference, not guessed at the end.
Step 4: Installation and Expansion Gaps
Boards are racked out so end joints are staggered and no two short pieces sit together, then fastened or glued to the method chosen. An expansion gap is left at every wall and fixed object, hidden later under baseboard or shoe molding.
We pull boards from several boxes at once while racking, so color and grain variation spreads evenly across the room instead of collecting in one corner where a single bundle happened to be opened.
Step 5: Finishing and Walk-Through
Prefinished floors get cleaned, trimmed and inspected. Site-finished floors are sanded flat, stained if chosen, and finished in several coats. We walk the floor with you, hand over the product and care information and give you a written humidity target for the house.
Hardwood Floor Installation Cost
What Drives the Price per Square Foot
The cost of hardwood floor installation turns on the material, the substrate and the job. Species, grade and width set the material price; solid against engineered changes both material and method. Removing old flooring, grinding or leveling a slab, repairing a subfloor and building transitions all add labor.
Published averages for this area disagree with each other, so we price from your rooms and your substrate rather than from a national number. The site visit is what turns a range into a figure you can plan around.
Prefinished Versus Site-Finished Pricing
Prefinished flooring usually costs more per box but saves the sanding and finishing labor on site. Site-finished flooring costs less per box but adds several days of sanding, staining and coating.
Which works out cheaper depends on the size of the job and the finish you want, and we can quote both so you can compare them side by side. Site finishing also allows a custom stain color that prefinished lines may not offer.
Reading an Itemized Estimate
Our estimates list removal and disposal, substrate preparation, material, installation labor, transitions and trim, finishing where it applies, and New Mexico gross receipts tax, which applies to labor as well as material. Moisture readings from the site visit are attached.
An estimate that is one number for the whole job makes comparison impossible. Line by line, you can see whether two quotes are for the same work.
- 20+ Years Experience
- Written Moisture Readings
- Itemized Written Estimates